ipmitool获取mac地址
抓取主板第一个网卡mac地址
ipmitool raw 0x30 0x21 | tail -c 18 |sed 's/ /:/g'
抓取BMC网口mac地址
ipmitool raw 0x0c 0x02 0x01 0x05 0x00 0x00|tail -c18| sed 's/ /:/g'
or
ipmitool lan print | grep "MAC Address" |tail -c18
抓取主板第一个网卡mac地址
ipmitool raw 0x30 0x21 | tail -c 18 |sed 's/ /:/g'
抓取BMC网口mac地址
ipmitool raw 0x0c 0x02 0x01 0x05 0x00 0x00|tail -c18| sed 's/ /:/g'
or
ipmitool lan print | grep "MAC Address" |tail -c18
原文链接 :https://acidborg.wordpress.com/2010/12/30/how-to-connect-to-cisco-devices-via-serial-port-using-gnulinux/
原文标题:How To Connect To Cisco Devices Via Serial Port Using GNU/Linux
Filed under: Linux, SysAdmin — acidborg @ 10:17
Description: to connect your computer to a Cisco device via its console port, you usually need a RJ45 rolled cable. You can use a RJ-45 to DB-9 Female if your computer has a serial port.
RJ-45 to DB-9 Female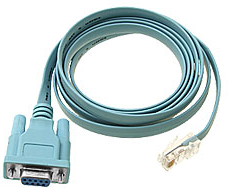
To communicate through the serial port with the Cisco device, you need Minicom, a terminal emulator software.
#/user set 0 name=NEW-admin  #将admin用户更名
/user set 0 password=密码
/user ssh-keys import public-key-file=id_rsa.pub user=admin
/ipv6 nd set [find] disabled=yes
/ip neighbor discovery-settings set discover-interface-list=none
/ip dns set servers=8.8.8.8
/ip ssh set strong-crypto=yes
/ip service disable telnet,ftp,api,api-ssl
/ip service
set www port=3000
set ssh port=3001
set api port=3003
set winbox port=3002
/ip firewall mangle add action=change-mss chain=postrouting new-mss=1420 passthrough=yes protocol=tcp tcp-flags=syn tcp-mss=!0-1420
#关闭ddns动态解析
/ip cloud set ddns-enabled=no update-time=no
/system clock set time-zone-name=Asia/Shanghai
/system identity set name=ROS-Name
#关闭ppp系列
/interface l2tp-server server set enabled=no
/interface pptp-server server set enabled=no
/interface sstp-server server set enabled=no
/interface ovpn-server server set enabled=no
修改用户密码
[admin@MikroTik]>/user                               #进入操作路径
[admin@MikroTik]/user>print                           #显示RouterOS用户
[admin@MikroTik]/user>set admin password=123456        #修改admin用户密码为123456
[admin@MikroTik] /user> /                              #返回根目录
在当前用户下修改密码
[admin@MikroTik]>password #修改本目录用户密码备份命令
wget http://download2.mikrotik.com/routeros/6.43.8/chr-6.43.8.img.zip -O chr.img.zip && \
gunzip -c chr.img.zip > chr.img && \
mount -o loop,offset=33554944 chr.img /mnt && \
ADDRESS0=`ip addr show eth0 | grep global | cut -d' ' -f 6 | head -n 1` && \
GATEWAY0=`ip route list | grep default | cut -d' ' -f 3` && \
echo "/ip address add address=$ADDRESS0 interface=[/interface ethernet find where name=ether1]
/ip route add gateway=$GATEWAY0
" > /mnt/rw/autorun.scr && \
umount /mnt && \
echo u > /proc/sysrq-trigger && \
dd if=chr.img bs=1024 of=/dev/vda && \
reboot
https://download.mikrotik.com/routeros/7.1beta2/chr-7.1beta2.img.zip
修改/etc/default/grub
GRUB_CMDLINE_LINUX="rd.lvm.lv=centos/swap vconsole.font=latarcyrheb-sun16 rd.lvm.lv=centos/root crashkernel=auto vconsole.keymap=us rhgb quiet"
GRUB_CMDLINE_LINUX="rd.lvm.lv=centos/swap vconsole.font=latarcyrheb-sun16 rd.lvm.lv=centos/root crashkernel=auto enforcing=0 vconsole.keymap=us rhgb quiet"
添加 enforcing=0 或者net.ifnames=0 biosdevname=0
GRUB_DISABLE_LINUX_UUID=true
存盘退出
 echo "GRUB_DISABLE_LINUX_UUID=true" >>  /etc/default/grub
sed -i 's#GRUB_CMDLINE_LINUX="#GRUB_CMDLINE_LINUX="net.ifnames=0 biosdevname=0 #g' /etc/default/grub
grub2-mkconfig --output /boot/grub2/grub.cfg
背景
Mac系统语言设置的是英文,安装的Office语言默认也是英文。由于习惯了中文Office的使用,想把Office的语言设置成中文,
方法之一就是直接修改系统的默认语言设置,但并不希望直接修改系统语言,仅想修改Office软件的默认语言
实现
1获取App的Bundle Identifier
Bundle Identifier是应用软件的标识,以Microsoft Word为例,Terminal中输入命令:
mdls -name kMDItemCFBundleIdentifier /Applications/Microsoft\ Word.app
2得到结果:
kMDItemCFBundleIdentifier = "com.microsoft.Word"
3修改应用程序默认语言
该操作需要用到第一步查到的应用程序Bundle Identifier,本例中是com.microsoft.Word,Terminal中输入命令:
defaults write com.microsoft.Word AppleLanguages '("zh_CN")'
slmgr /ipk [密钥]
https://moeclub.org/2018/12/02/710/
slmgr /skms kms.moeclub.org
slmgr /ato
slmgr /xpr
https://www.moerats.com/kms/
slmgr /skms kms.lolico.moe
slmgr /ato
slmgr /xpr
主页https://03k.org/kms.html
slmgr /skms kms.03k.org && slmgr /ato
主页https://v0v.bid/
slmgr /skms kms.v0v.bid && slmgr /ato
slmgr /skms k01.v0v.bid && slmgr /ato
slmgr /skms k02.v0v.bid && slmgr /ato
slmgr /skms k03.v0v.bid && slmgr /ato
slmgr /skms k04.v0v.bid && slmgr /ato
slmgr /skms k05.v0v.bid && slmgr /ato
slmgr /skms k06.v0v.bid && slmgr /ato
slmgr /skms k07.v0v.bid && slmgr /ato
slmgr /skms k08.v0v.bid && slmgr /ato
slmgr /skms k09.v0v.bid && slmgr /ato
slmgr /skms k10.v0v.bid && slmgr /ato
slmgr /skms k11.v0v.bid && slmgr /ato
slmgr /skms k12.v0v.bid && slmgr /ato
slmgr /skms k13.v0v.bid && slmgr /ato
一条for解决大部分问题,顺道学习for命令,其他缺失环节没打算复制过来。
@echo off
FOR /L %%i IN (0,1,8) DO (
dism /mount-wim /wimfile:D:\iso\install.wim /index:%%i /mountdir:D:\%%i
dism /image:D:\%%i /add-driver /driver:D:\iso\2008drivers /recurse /forceunsigned
dism /unmount-wim /mountdir:D:\%%i /commit
)
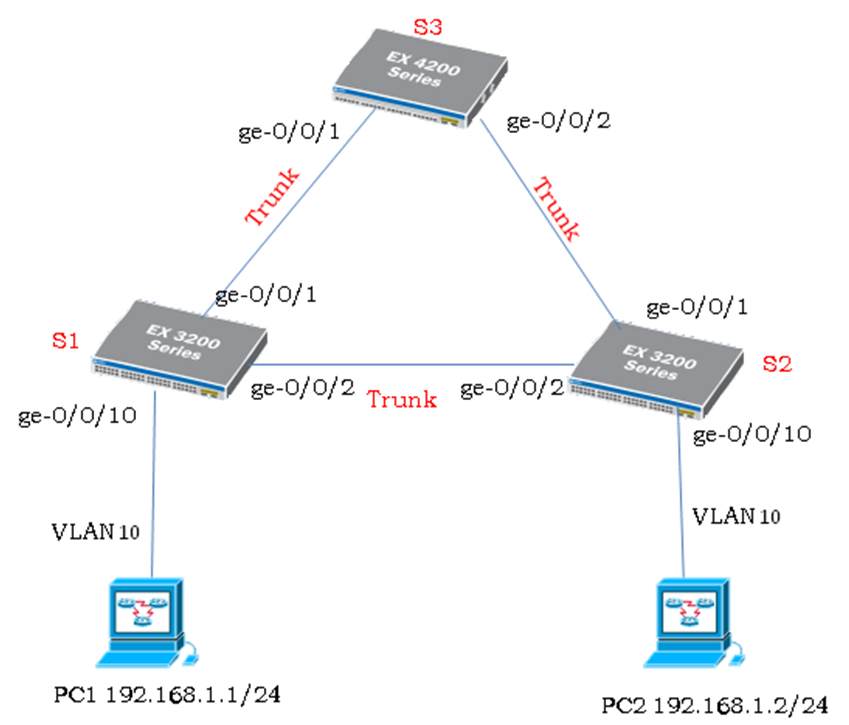
S1交换机:
set protocols stp enable #"打开stp功能"
set protocols stp bridge-priority 8k #"设置stp的优优先值"
set protocols stp interface ge-0/0/1.0 priority 8 #"设置stp端口优先值"
set protocols stp interface ge-0/0/2.0 priority 8
S2交换机:
set protocols stp enable
set protocols stp bridge-priority 16k
set protocols stp interface ge-0/0/1.0 priority 16
set protocols stp interface ge-0/0/2.0 priority 16
S3交换机:
set protocols stp enable
set protocols stp bridge-priority 32k
set protocols stp interface ge-0/0/1.0 priority 32
set protocols stp interface ge-0/0/2.0 priority 32
检查命令:
Show span-tree bridge
转载自:http://mtonet.com/?p=282
说明:EX交换机除了具有二层VLAN功能之外,还具有三层VLAN路由功能。
EX交换机会有一个名字为vlan的三层逻辑端口,这个三层逻辑端口可以划分多个逻辑unit单元,unit号范围是(0..16385),而每个逻辑unit单元可以配置IP地址然后跟一个VLAN绑定,实际上unit 单元号和VLAN号没有对应关系,但是为了维护方便,我们建议在实际应用中unit单元号和vlan号配置相同(如下面的vlan.10中的10是unit单元号,它实际上可以跟VLAN 20绑定,但是在实际中最好将它和vlan 10绑定),这样在EX上就可以配置不同VLAN的网关地址了。
例如下面交换机划分了3个VLAN,每个VLAN对应的网关IP分别配置在vlan.10 、vlan.20以及vlan.30端口(跟Cisco的interface vlan10和interface vlan20,interface vlan30效果一样的)。
一、添加/修改VLAN
如果创建一个名字为liy_vlan的VLAN 10,并且网关设置为192.168.1.1/24,ge-0/0/1属于该VLAN。
配置步骤:
(1)创建VLAN
#编辑vlan信息liy_vlan是vlan名字,如果不存在则新建一个VLAN
lab@EX4200-1# edit vlans liy_vlan #"以下所有操作都是对liy_vlan进行"
[edit vlans liy_vlan]
lab@EX4200-1# set vlan-id 10 #"设置liy_vlan的vlan id"
lab@EX4200-1# set description "Server VLAN" #"设置vlan描述"
lab@EX4200-1# set mac-limit 200 #"设置mac数量,范围是(1..65535),通常不配置"
lab@EX4200-1# set mac-table-aging-time 600 #"设置mac生存时间(秒),范围是(60-1000000) "
lab@EX4200-1# set l3-interface vlan.10 #"将绑定三层逻辑子端口"
lab@EX4200-1# set interface ge-0/0/1.0 #"将端口加入到VLAN中"
lab@EX4200-1# set interface ge-0/0/2.0 #"将端口加入到VLAN中"
(2)创建三层逻辑子端口
lab@EX4200-1# top #"回到最外层菜单"
[edit]
lab@EX4200-1# set interfaces vlan unit 10 family inet address 192.168.1.1/24
(3)将交换机端口修改为access模式并加入到新创建的VLAN中
lab@EX4200-1# top #"回到最外层菜单"
[edit]
lab@EX4200-1# set interfaces ge-0/0/1 unit 0 family ethernet-switching port-mode access
lab@EX4200-1# set interfaces ge-0/0/1 unit 0 family ethernet-switching vlan members 10
lab@EX4200-1# set interfaces ge-0/0/2 unit 0 family ethernet-switching port-mode access
lab@EX4200-1# set interfaces ge-0/0/2 unit 0 family ethernet-switching vlan members 10
(4)commit提交:
lab@EX4200-1#commit
二、删除VLAN
由于一个VLAN创建之后,会被端口引用,可能还创建了三层端口,因此在删除vlan的时候需要把端口引用关系接触同时删除三层vlan子端口,删除步骤如下:
1.删除端口vlan
lab@EX4200-1# top
[edit]
lab@EX4200-1# delete interfaces ge-0/0/1 unit 0 family ethernet-switching port-mode access
lab@EX4200-1# delete interfaces ge-0/0/1 unit 0 family ethernet-switching vlan members 10
lab@EX4200-1# delete interfaces ge-0/0/2 unit 0 family ethernet-switching port-mode access
lab@EX4200-1# delete interfaces ge-0/0/2 unit 0 family ethernet-switching vlan members 10
2.删除vlan对应的L3子端口
lab@EX4200-1# top
[edit]
lab@EX4200-1# delete interfaces vlan unit 10
3.接着删除vlan配置
lab@EX4200-1# top
[edit]
lab@EX4200-1# delete vlans liy_vlan
转载自:http://mtonet.com/?p=268
EX交换机在前面面板LCD旁边,有一个alarm的告警LED灯,当系统出现出现alarm之后,除了在系统日志中反映出来,还可以通过LED显示出来。可以设置端口down产生告警,并且定义LED的显示颜色。EX不支持对单个端口定义产生alarm告警,只能对全部端口或者MGT管理端口产生link down的alarm告警,一旦端口down之后会在alarm LED上显示出来。(注意:如果设置了端口link down的alarm告警,则不用的端口最好disable)
配置方法:
lab@EX4200-1# top
[edit]
lab@EX4200-1# set chassis alarm ethernet link-down red #"设置全部端口产生告警"
lab@EX4200-1# set chassis alarm ethernet link-down ignore # "全部端口不产生告警"
lab@EX4200-1# set chassis alarm management-ethernet link-down red# "MTG端口产生告警"
link-down后面可以选择的参数有:
ignore Do not assert any alarm signals
red Assert red system alarm
yellow Assert yellow system alarm
转载自:http://mtonet.com/?p=265
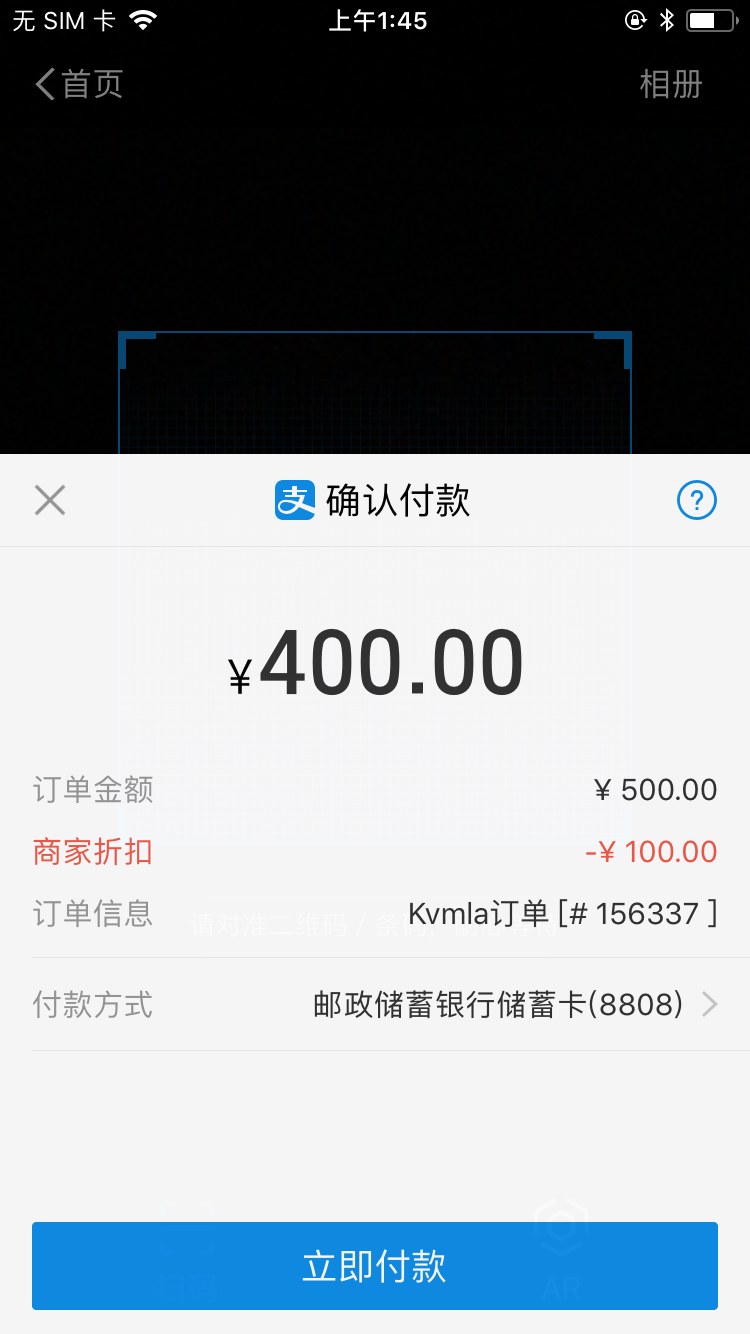
*先使用手机支付宝领取折扣券,付款的时候选择二维码扫码支付获得20%的折扣.
*有效期为领取后30天内,一个人一次.
* 一共30个名额
*可叠加其他优惠码使用
*在https://www.kvmla.com 上所有的订单和账单都可以走二维码通道使用.
本次活动为一次尝试,后续陆续会做一些代金券的活动.
手机访问链接: https://m.alipay.com/vZAKa1U
二维码领券

付款示例图
systemctl stop NetworkManager
systemctl disable NetworkManager
前两天在电报群里面看到屌鸡在问这玩意顺道捡来的,我平时还是喜欢用MegaCli直接看。
这玩意其实就是把MegaCli的命令做了个集合输出,在使用前得先安装有MegaCli和python。
安装包地址:http://dl.kvm.la/lsi/MegaCli_All_OS
wget https://raw.githubusercontent.com/eLvErDe/hwraid/master/wrapper-scripts/megaclisas-status
python megaclisas-status